Tags
Tags are a new feature introduced in CELUS 5.0 which allows users to attach arbitrary labels to individual titles, platforms and organizations.
Tags may be used for filtering of the corresponding lists (list of titles, platforms, organizations) and in the reporting module.

Use cases
Tags are a generic feature which can be used for a variety of purposes. Some of the use cases are:
tagging titles by collection to compute statistics for the whole collection
tagging titles by topic or subject area for purposes of filtering or statistics
tagging of member institutions by organization type, membership type, etc.
ad-hoc tagging of individual titles to enable their comparison in the reporting module
Access rights
There are four types of permissions / access rights which influence the behavior of tags:
Assigned to |
Action |
Desciption |
|---|---|---|
Tag class |
edit |
Who can edit and/or delete a tag class |
Tag class |
add tags |
Who can add new tags to a class, modify existing tags and delete them |
Tag |
assign to items |
Who can assign a tag to individual items, such as titles, platforms, etc. |
Tag |
view |
Who can see the tag in the user interface |
Each of these access rights can have several values:
Value |
Description |
|---|---|
Everybody |
Every logged in user can perform the action |
Organization members |
Only members of a specified organization can perform the action |
Organization admins |
Only administrators or specified organization can perform the action |
Consortium admins |
Only consortium administrators can perform the action |
Owner |
Only the owner/creator of the tag/tag class can perform the action |
System |
No user can perform the action, it is reserved internally for CELUS |
Combining the above access rights with different values allows creating tags for a wide variety of use cases. Here are some examples:
Consortium admins can tag each organization by their subscription status without anybody else being able to see the tags.
Consortium admins can tag titles by the name of a collection. All users will be able to see the tags and use them for filtering, but only consortium admins will be able to modify the assignments.
Organization admins can create a set tags which would express importance of a specific title and let their users assign them to individual titles. The tags would be only visible inside the organization at hand.
Any user can create tags for his/her personal use and then use them for ad-hoc filtering of titles in the reporting module.
Working with tags
Creating tags
Tags are managed in the “Tags” section of the main menu. Before you can start using tags, you need to create at least one tag class and at least one tag.
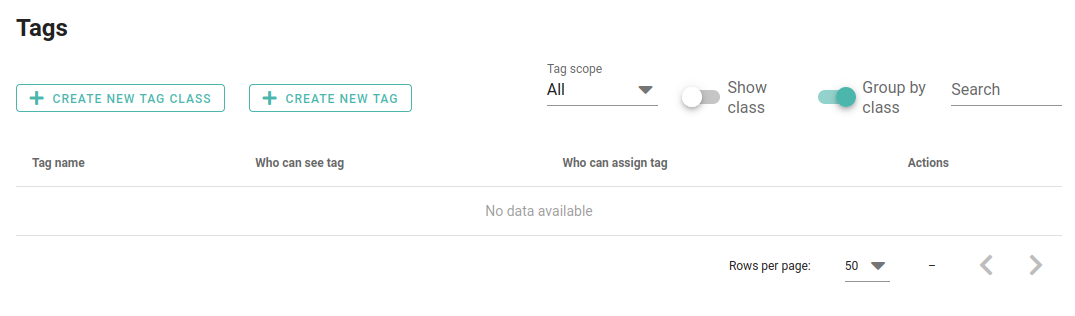
To create a tag class, use the “Create tag class” button as shown above.
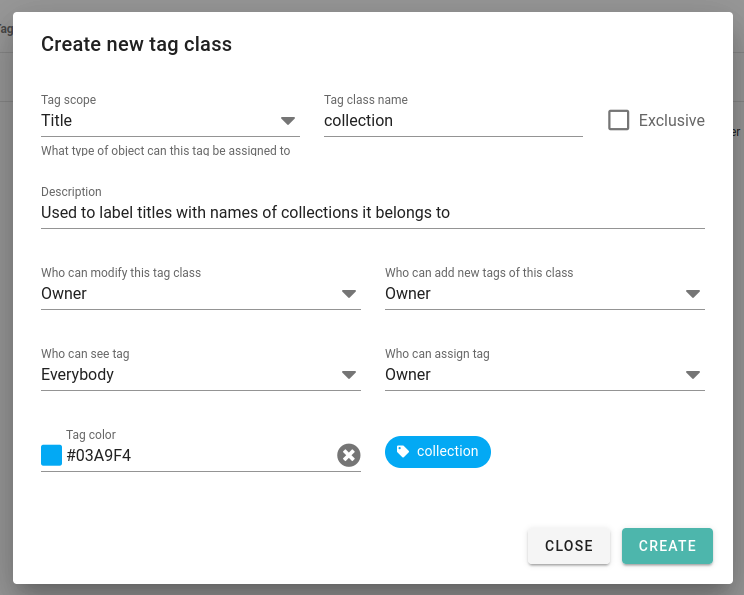
Please note that a tag class has always a scope assigned to it. It specifies to which type of items the tags in the class can be assigned. For example, you can create a tag class for titles by assigning it the scope “Titles”. Tags of this class can only be used for titles, not for example platform.
See Exclusive tags above for more information about the “Exclusive” checkbox.
When you create a new tag class, do not be alarmed that it does not show in the list of tags. Only tag classes containing at least one tag are shown in the list. To add a tag to a class, use the “Add tag” button.
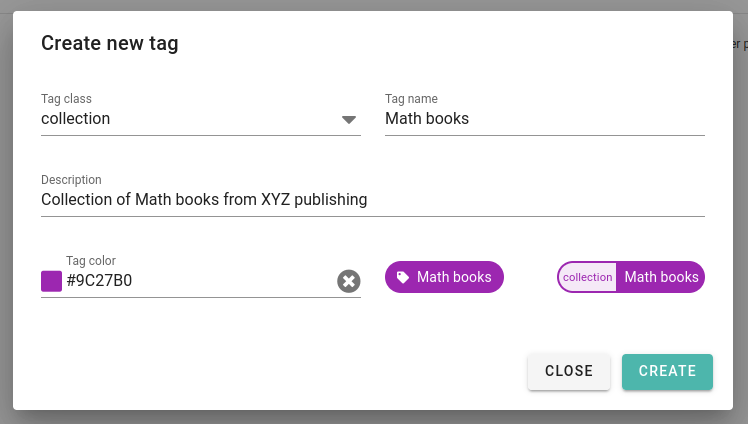
After you create the new tag, it will be automatically shown in the list of existing tags:

You can create as many tags as you wish. To edit a tag, click on the “Edit” button next to it. When you create a tag, it will inherit the color from the tag class. You can choose a different color when creating or editing a tag.
Assigning tags
Tags are assigned to individual items on the detail page of the item. For example, to assign a tag to a title, go to the detail page of the title and click the “Edit” icon on the “Tags” card.
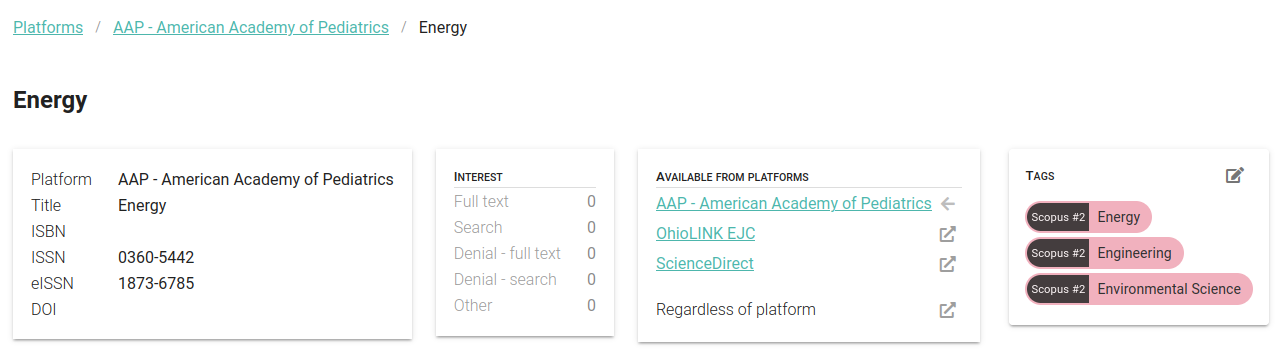
You will be presented with a list of all tags with scope “Title” and you can select the ones you want to assign to the title.
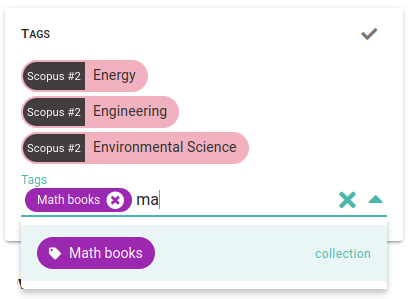
The assignment is finalized when you hit the checkmark icon in the top right corner of the card.
Filtering by tags
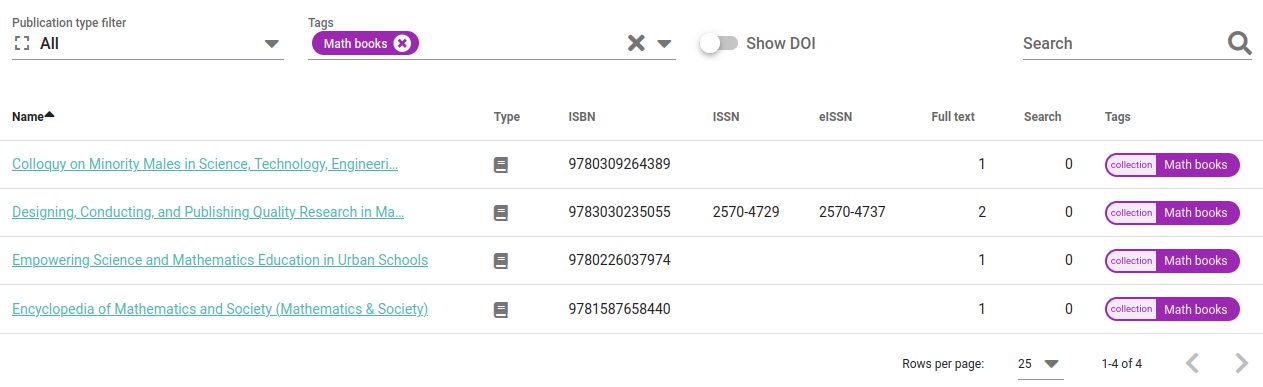
The lists of titles, platforms and organizations can be filtered by tags. On each of these pages, you will find a “Tags” card which allows you to select the tags you want to filter by.
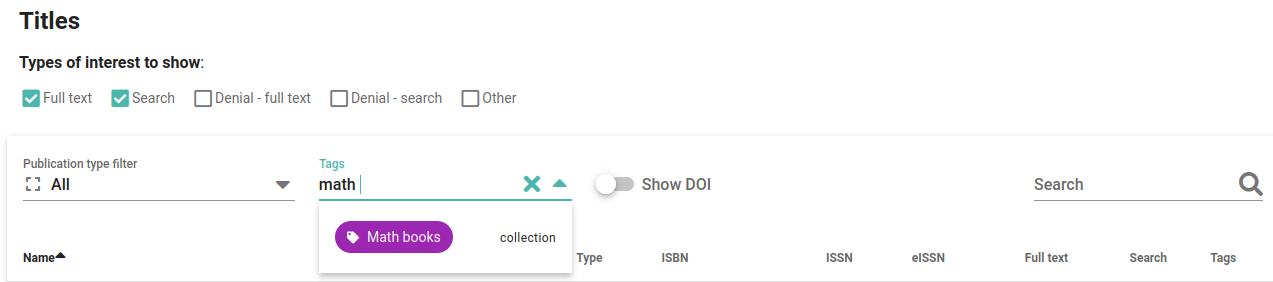
After you select the tags, the list will be filtered to show only the items which have at least one of the selected tags assigned.
Using tags in reporting
The reporting module allows you to use tags for both filtering and grouping of the data.
Filtering
When you select to filter by any of the “taggable” items (titles, platforms, organizations), you will be presented with a list of all tags with the corresponding scope.
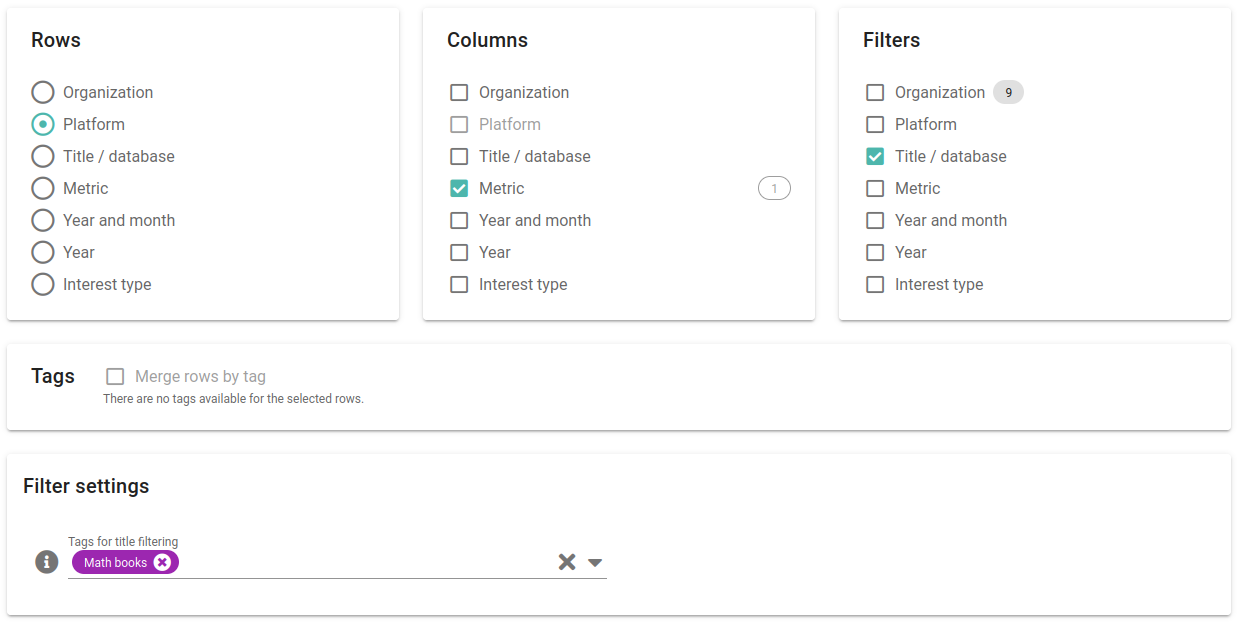
The filter will be applied regardless of whether the item is used in rows, columns or neither of them. For example, if you select a tag “Math books” for filtering titles and then configure the report to have platforms in rows and metrics in columns, the report will show only the usage of titles with the tag “Math books” for each platform.
Grouping
When you configure your report to have one of the “taggable” items in rows, a checkbox “Merge rows by tag” will appear. If you check it, instead of getting individual items in rows, you will get one row per tag of the corresponding scope. In this case, it is also possible to limit the shown tags to only those of a specific tag class.
So if you have for example tagged titles with topic-related tags, you can create a report where each topic will be shown in a separate row.
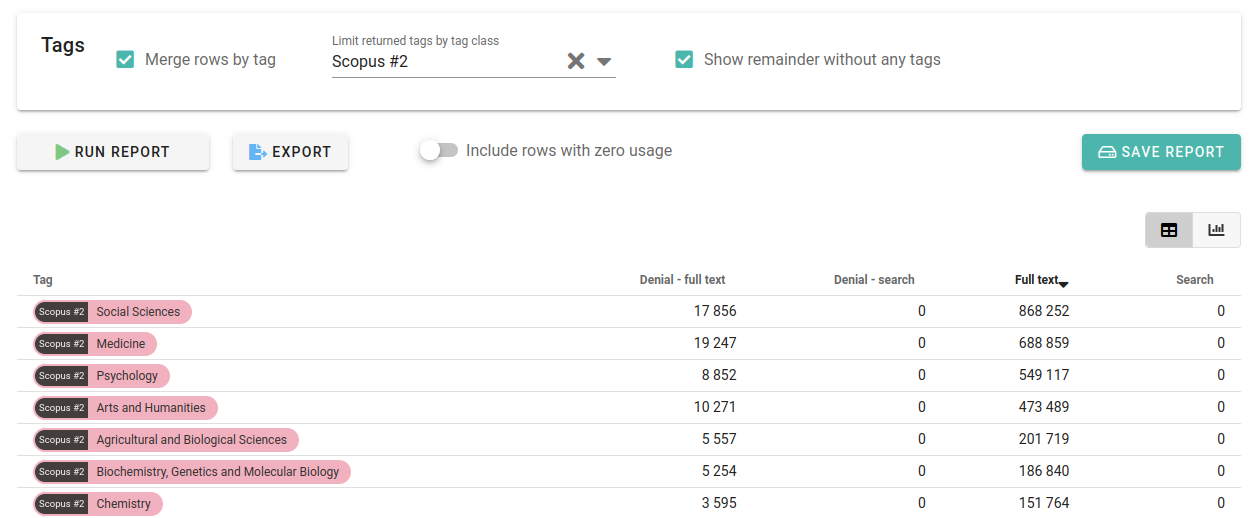
Note: Please note that unless the corresponding tag class is marked as “exclusive”, the usage of each item will be counted for each tag it has assigned.
Because it is very unlikely (especially for titles) that you will have each title tagged, it may be of interest to see the usage of titles which are not tagged. To do so, you can check the “Show remainder without any tag” checkbox and usage of all items which are not covered by the shown tags will be shown in a separate row at the bottom of the table.
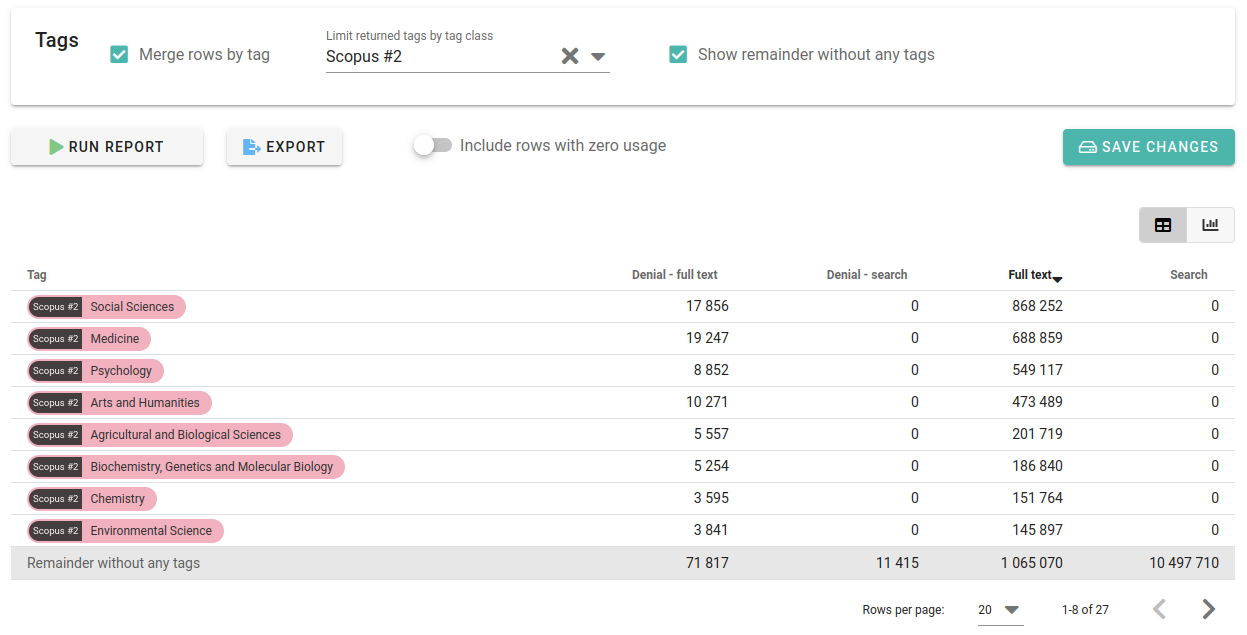
Please note that if you limit the shown tags to a specific tag class, the “remainder” row will contain the usage of items which are not tagged with any of the tags of the selected class - regardless of whether they have other tags assigned.
Tagging many titles at once - title lists
It is very common to want to tag many titles at once. Typically you would want to tag all titles belonging to one collection. To make this process easier, CELUS allows you to upload a file containing a list of titles and assign tags to all of them at once.
To create a title list, go to the “Title lists” section of the main menu and click the “Upload a new list” button. You will be presented with a form where you can upload a CSV file with the titles.
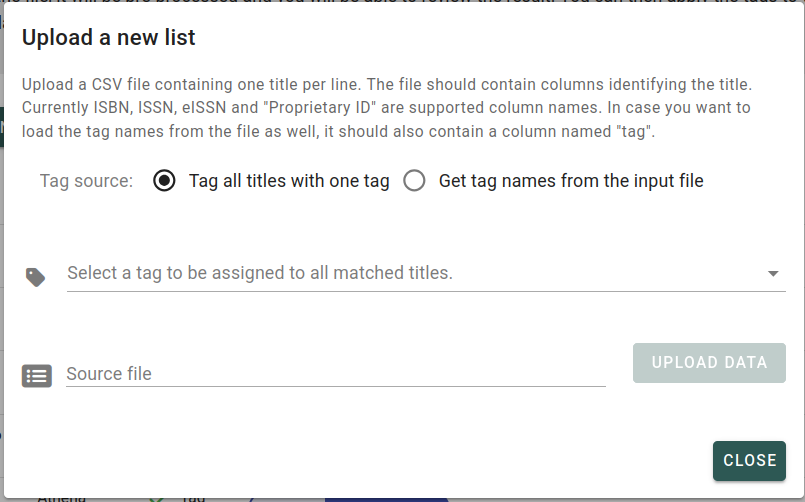
As you can see, there are two options for the tag to be used. You can either select the tag manually or read it from the file. The two options are described in detail below.
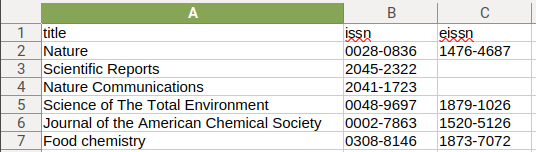
In both cases, the file must contain at least one column with the title IDs. It can be any of ISSN, eISSN, ISBN or “Proprietary ID”. This means that at least on of the columns should be named “ISSN”, “eISSN”, “ISBN” or “Proprietary ID” (case is not important, so both “issn” and “ISSN” will do). There may be other columns present, but they will be ignored.
You can include a column with the title name. It is optional and will not be used for the matching. However, it can help you to identify the titles in the file if you want to review the results later.
Tagging using a manually selected tag
If you select the tag manually, all the titles matched to the file will be tagged with the selected tag.
A example file may look like this:
Tagging using a tag read from the file
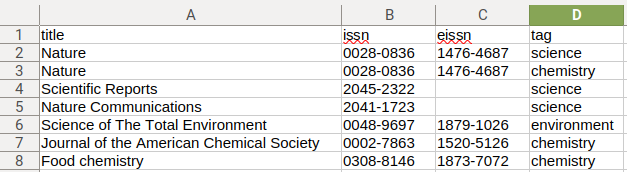
In this case, the file should contain a column named “tag” with the tag name. You will be asked to select the parent tag class for the tags in the file.

If the corresponding tags are not present in the tag class, they will be created automatically during the tagging process.
Tip: If you want to tag one title with multiple tags, you can add the title on multiple rows in the file, each with a different tag.
A example file may look like this:
Title list processing
After you upload the file, a preprocessing step will be performed. Depending on the number of titles in the file, this may take a few minutes. When the preprocessing is done, you will be presented with an overview of how well the titles were matched to the database.
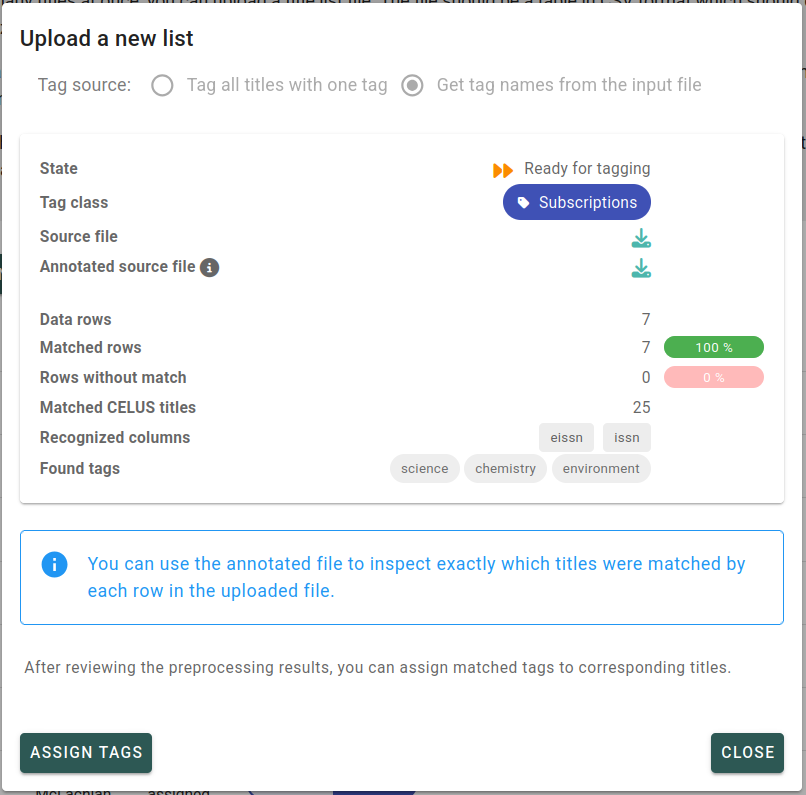
In the example above, you can see that out of a 7 rows in the file (excluding the header), 25 titles were matched to the database. There were 0 rows which did not match any titles in the database. Please note that one row may match more than one title, so the sum of the matched titles and the unmatched rows may be higher than the number of rows in the file.
If you wish to review in detail which titles were matched and which were not, there is a link to the annotated source file. This file will contain the same rows as the original file, but an extra column (_CELUS info_) will be added with the result of the matching. It shows the number of matched for that line and contains links to the matched titles.
You will also be shown which columns were used for the matching. If you find that some of the columns you expected to be used were not used, you can recheck and reupload the file.
When the tags are read from the file, you will be shown a list of all the tags found in the file.
When you are satisfied with the results, you can click the “Assign tags” button.
After some crunching, the tags will be assigned to all titles which were matched and the tagging statistics will be updated (the numbers of matched titles may change slightly if new titles appeared in the database between the time of upload and time of tagging).
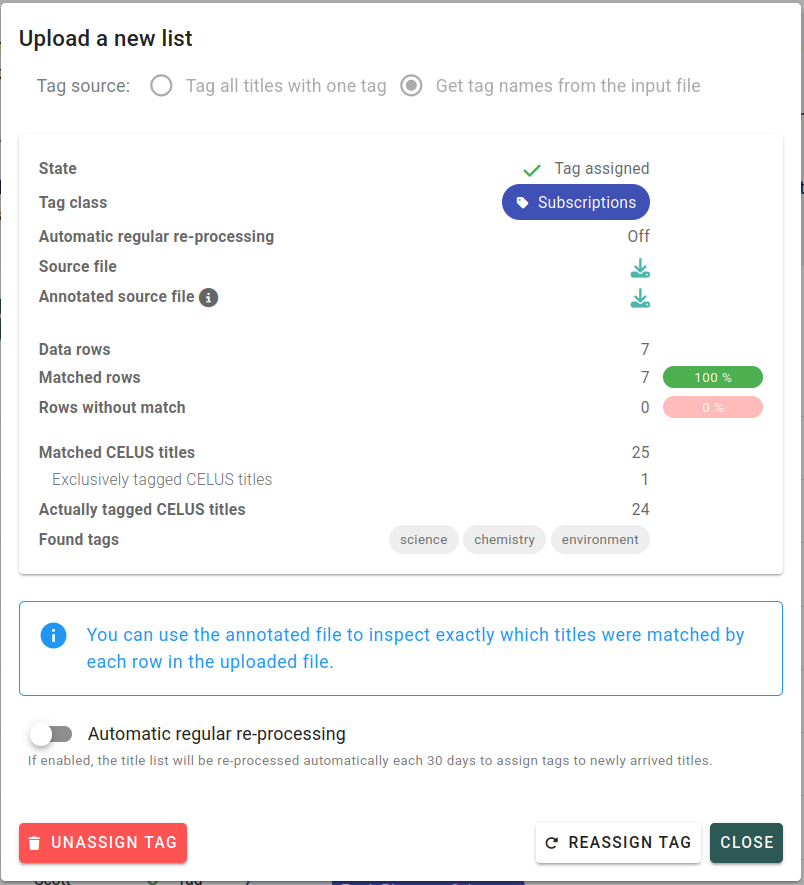
At this point, the tags are already applied to all the matched titles and you can use it everywhere else in CELUS.
Removing tags
If you find out that some of the titles were not matched correctly or have some other reason, you can remove the tag from all the tagged titles. The title list remembers which titles were tagged from that particular file, so if you hit the “Unassign tag” button above, the tag will be removed only from the matched titles. It will be preserved for the titles which were tagged manually or from other files.
The same will happen if you delete the title list completely. The only difference is that you would loose the uploaded file itself and would need to reupload it if you want to use it again.
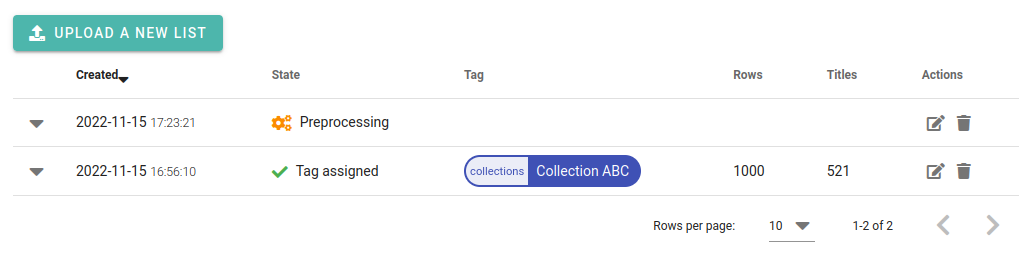
You can accomplish this by clicking the “trashbin” button in the title list table shown below.
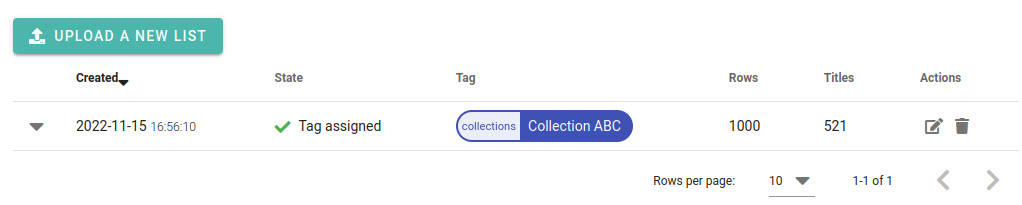
Please note that you can interrupt the tagging process at any time and return to it later. Any uploaded title list will be preserved in the list of title lists and you can continue working with it where you left off.
Title list re-processing
If you want to reprocess the title list, you can click the “Reassign tag” button. This will go over the content of the file once again and assign tags to the titles which were not tagged yet. (This is useful when new titles have arrived since the last time the title list was processed.)
Very often it is useful to do the reprocessing regularly. To make your life easier, you can enable automatic reprocessing by turning on the switch “Automatic regular re-processing”. When this is turned on, CELUS will reprocess the title list automatically every 30 days.